
Another image from the Marlee Matlin shoot by Jeff Vespa has appeared on Bustle. You can view it here.

Making Anaglyph 3d Images Part 2
Ok, so you have tried to make your own images in 3D, and maybe you need to get some bugs out if. Keeping images on the same focal plane is tough, and using a tripod is only part of the solution. You still need to move the camera the 55mm, and if you pan the head of the tripod, you will not get a correct 3D image, you will get some gobbledygook that will give the viewer a serious headache. So what do you do?
Well I have some solutions. An idea I touched on in my last how to post is to set your camera on a wall, or something sturdy to shoot on. Railings can work well, top of a car, whatever you can find. One solution is to get a custom head. I got one of these:

Manfrotto wormscrew macro photography rig.
it has a wormscrew so you can do fine adjustments for macro photography, but I move it 55mm (using the measuring gauge on the front) for each eye shot. If you want to really get creative, try to put a tilt pan head on top of this! Setup properly, you can get consistently spaced shots every time. They run about 120 bucks on Amazon.
Or you could pick up a special “lens in a cap” for shooting stereoscopic images in one capture. I used to have one of these Loreo image splitters (but it got crushed in my luggage on a flight) and it works well but you are only going to get about 40% of your image between the split and the distortion. This is a great solution for shooting moving objects like people, or nature in windy conditions.

Here are some examples of my shots with it and the 3D images I created:

Image is split, and there is some transitional distortion that will need to be cropped out…

End result. You will always end up with a Portrait orientation with this method…
I recently found this on Amazon, and I’ll post a review once I get mine!
Another thing to keep in mind is that the focus and exposure must be the same for both shots. You don’t want your eyes bugging out on you while your brain tries to decide what focus plane to hone in on when looking at 3D images.
More hints on the way. Hope you are making some 3D images yourself!
Holga on DSLR...
Okay, so I have played around with my $14 Holga lens on my D800, and just like the original Holga, you can never really tell what you have until you have it. The original Holga is locked in at f8, and this one was advertised as just that, but it was not. Looking through the viewfinder was extremely difficult on bright sunny days, so much that I longed for the Holga finder just to compose an image. I have a simulated image of what I see through the viewfinder:
Really hard to compose an image with this view.
This was problem number one. Could not see anything, so composing was frustrating. Then I discovered another issue, in the final shots. A vignette was on every image. Now the Holga is a 120 medium format film camera, and a 60mm lens should not produce a vignette on a smaller image size. 135mm image should have no vignette. After digging around on the internet I found that they added an artificial vignette plate to the lens to simulate the “Holga look”. This became very apparent with lens flare in another image:

yuck!
On the same website I found out that there was also a stop down ring added to bring the f8 to f25 causing the darkness (probably to add sharpness to a crummy lens). These things were making a quirky lens pretty difficult to use, so I decided to remove them.

f25 stop down ring, and vignette dither ring removed from lens.
So now after some basic lens surgery, my lens is now back to the f8 aperture, and focus is more difficult to achieve, but it is the closest thing to an actual Holga. Stay tuned for images from this modification. Hopefully it will be fun to use now….
Mighty Peking Man
Yet another film about a giant gorilla terrorizing a city. And another one capitalizing off the De Laurentiis King Kong of ‘76. This one was produced by the Shaw Brothers, a Hong Kong Studio famous for making the greatest Kung Fu movies of all time! This is one of the more entertaining knock offs that happened in the late 70s. Roger Ebert even gave it 3 out of 4 stars in his review for the Chicago Sun-Times! Pretty good for a cheap monkey movie.
I got the opportunity to watch this at Portland’s Hollywood Theatre some years ago and really enjoyed it, though there were some really ridiculous things going on. The special effects were pretty doggone bad, a lot of matte masking to show the size of the “giant” ape in relation to humans. Still this was pretty entertaining, and fun to watch.

One of the big differences to the other ape movies is that the girl was friends with the ape instead of being terrorized by him. Samantha, an orphaned girl who has grown to a woman of the jungle is friends with all the animals. She plays with all the beasts of the jungle while dressing in a very sheik jungle outfit (which she wears throughout the entire flick).

Dancing with this leopard without him mauling you? This leopard deserves an Oscar for his performance!
Sooner or later the ape ends up in Hong Kong and all hell breaks loose. The ape climbs the tallest building he can find dies in the end. Original ending, huh?

you talking to me?
Tramway Gas Station New Angle
Just found another angle of the Tramway Gas Station in Palm Springs California.

Marlee Matlin Images in Backstage Magazine
Had the pleasure of working with Jeff Vesap this last month on some images of Oscar winner Marlee Matlin. Jeff and I used to collaborate over 15 years ago, back when I was living in Los Angeles. He shot images of Ms Matlin for a few publications to promote her work in the Apple TV+ film, CODA.
I worked on these images for the magazine Backstage. It has been a long time since I have done any celebrity work, so it was exciting to get back into that stuff, and to work with Jeff again!
You can see the images for Backstage here (full disclosure, I did not do the cover).
SCREEN SHOTS OF THE WEBPAGE BELOW:


Went to my first post COVID movie
Well, I went to see a movie at the Hollywood Theatre, my first post COVID in theatre experience.
Met a friend there and saw the original Death Race 2000.

Went to my first post-COVID live show...
Well, just in time for the dreaded Delta variant, a friend invited me to see some live music. Being fully vaccinated, I knew I would be safe, but now that children are being affected by the delta variant, I was a bit concerned. Well things went just fine. Masks were required, and they even asked that everyone show a vaccination card on entry.
I didn’t see anybody flipping out. No body complained about their freedom being taken away. Nobody was disrespectful. No ones head blew up. Nobody pooped their pants. Show was great, and it was refreshing to see everyone having a good time while this pandemic drags on. Its great to see that we can adapt and get through this.
A Classic Bowling Alley in 3D
I love bowling alleys, and it is rare to find them around anymore. Even more rare is seeing a bowling alley that was never updated to the flashy screens and electronic scoring systems. I found this bowling alley in Hilo on the big island of Hawaii. The staff there were very nice and allowed me to come in and shoot before they opened and I took some great shots of their amazing bowling alley.

Holga Lens Test Part 1
Well I went out one afternoon and did some very simple tests with my Holga lens on my Nikon D800 DSLR. It was fun, a new exploration. One of the mysteries of shooting with film on a Holga still rings true. The fixed f8 aperture makes it so dark you can barely see viewfinder. Would be nice to have a finder I could mount on the hot shoe, but whatever. It’s a cheap-o plastic lens, what more do you want?
So I made some basic shots just up and down my street using some simple subject matter in bright sunlight.
The original Holga manual (I still have mine) says to use ISO400 film. So I set the ISO to 400. The Holga lens is fixed at f8, and the shutter speed is an estimated 1/100th of a second, so that is where I set mine. Exosure was too hot so I took it down to 1/60th, though I can (and probably will) do a more accurate test of the correct exposure for future images.
The following 3 images are just a basic exposure, with no raw correction. I am not sure what the focus was doing, so I guess I need to do some testing with that as well. Looks like Holga!


One thing I did notice is the vignette-it seems off. Holga used 120 medium format film, a larger image size than my full frame DLSR. I know there is a vignette with all Holga cameras, but I would expect less of it on the 135mm frame. It’s nice, but as a person who likes to make images awesome, I like to add vignette myself. But I guess that is opposite of what this is: junk photography.
Making Anaglyph 3D images Part 1
curious how to create your own anaglyph 3D images? Not hard to do if you have some basic tools, photoshop and a good subject to shoot for a 3D image, and a digital camera.
I was attracted to 3D when I was very young, I loved how you could look at something with those glasses and see things jump right off the page. Anaglyph 3D is an evolution from the old Stereoscopic images you may have found in antique stores, but never had a viewer to see them with. The glasses block out color from one eye so you can see a different angle in each eye, creating a parallax, and your mind translates it as a 3D image from a 2D source. 3D images are truly the original “virtual reality”.
Most 3D images from the past were shot with a stereoscopic camera, or a camera with 2 lenses. One lens would shoot for the left eye, and one for the right. Images were usually shot in black and white and printed on color printing paper, but color images could also be used. Here is one of those old cameras:

I always wished I had one of these in the film days, but never acquired one…
Now in the modern digital days there are many options to creating these 3D images and several of them are very expensive stereo cameras (2 lenses) used for augmented reality and 3D mapping. We will not be discussing these here, we are going to explore shooting 3D images with a digital camera, or even with a phone and creating the red/blue effect within photoshop!
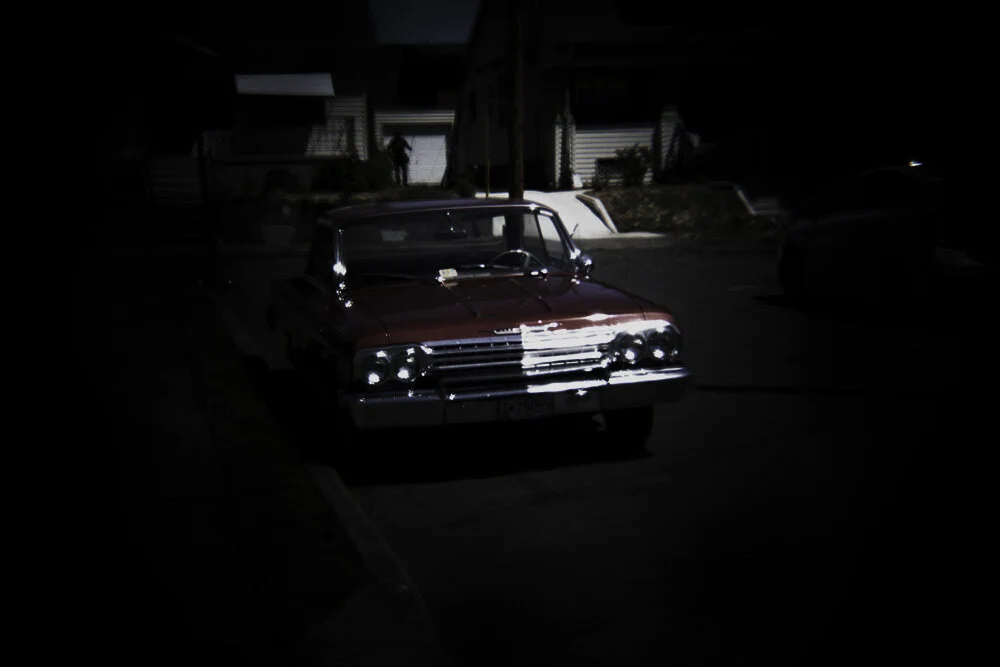
The first step to creating a 3D image is to find the proper subject matter. Nobody wants to see a 3D image of a billboard or a poster on a wall, what fun is that? You need to find something with stuff sticking out here and there to make the image interesting. Lots of foreground and background variation, but keep in mind the foreground objects will have the most 3D effect and could be distracting, so try to keep those items around the framing of your image.
Next you will need to take 2 pictures, like the old fashioned cameras did. But since you are probably using a single lens on your camera or phone (multiple lens phone cameras will not work for this), you will need to move the camera slightly to create your second exposure. Very important: since our eyes are arranged horizontally, we also need to make our camera move horizontally or this will not work. Landscape orientated photos work best. 55mm is the average distance between a human’s eyes, so we will need to move the camera 55mm or just over 2 inches. So shoot one image, move the camera then shoot another. It is helpful if you have something to set the camera on, as you want the position of the lens to move just that little bit and not all over the place to keep the 3D effect as accurate as possible. Try keeping the focal plane the same for both shots (try not to rotate the camera when moving it).
So, you got your pictures shot and now you have 2 images. If you could put them side by side, on screen, and close one eye and then switch open eyes really fast this would work great, but nobody I know can do that, so we need to put these images together into one to create the effect. So open both images in photoshop, then drag the background layer from one image on top of the other (while holding shift of course) so you will have an image with both shots in separate layers (you can close the image you dragged from we do not need it anymore). Double click on the background layer, you should now have 2 layers, Layer 0 on the bottom and Layer 1 on the top. One of these will be the left eye shot and one will be the right. If you know which one it which, you only have one more step to create a 3D image. Next step is to click on the top layer (Layer1) and double click on the layer itself and turn off the red channel:

Ok, now for the moment of truth. Slip on your glasses and take a look at your image. Does it look 3D? If you did everything right, it should. Now, if you got your images arranged correctly, things should be jumping out at you, but if you got your images mixed up then things will be jumping back. This is a common problem, even for those who do this often. Even if you keep shooting one side first, sometimes, somehow things get mixed up. But the solution is simple. Click the red layer back on, then move Layer 0 to the top of the layer stack, and then turn off the red channel for that layer. This should fix the backward image.
Black and white images will look great as anaglyph 3D images, but they need to be in RGB color for this to work. Simply desaturate the layers keeping them in RGB. Color image look great as well. Finding the creative balance is all part of the fun. Give it a try sometime!
Junk Photography
I often reminisce about the days of film and the occasional “happy accidents” that might happen on any shoot, be it professional of just for fun. Digital has brought us the ability to create images and see the result instantaneously, fixing problems and deleting them before the clients get their eyes on them. Film was another story, of course. Even if you know the film (stock, batch and shelf life), camera, and lighting, there was an occasional surprise, be it a bad exposure or a magic moment captured accidentally.
I also think about what I call the “Junk Photography” movement, where people would use crappy cameras and lenses to create some kind of old retro look. Shooting with cameras with plastic lenses, be it a Holga camera or a Lomo got interesting results. Instagram has pretty much replaced this, and the photography hipsters have embraced it.
I have many cameras new and old, and though I have no desire to get rid of my film cameras, I really do not use them anymore. I have no idea what the cost would be but I imagine these days, processing and printing of negative film (be it color or black & white) is quite expensive. Still I really miss those days and wish there was a way to go back. Maybe halfway?
Well I have found a way. I purchased this Holga lens from the internet for about 14 bucks.

After slapping it on my Nikon, I was forced to remember just how low-end the Holga is. There is noting here, just a fixed aperture, and a jenky focus that will get you maybe close to what you want. Looking through the view finder on a sunny day is a futile attempt, so I found I’m missing the Holga finder at the top of the camera.
Stay tuned for some pictures with this lens….
Summer is going fast...
Well this summer is going by so fast. Just a little image of my Hamms Bear after being surprised in the shower in 3D.

More shots of the Tramway Gas Station/Visitors Center...
Here are a couple more views from the Tramway Gas Station in Palm Springs. Such an amazing design for a gas station. Makes me wish the “Bomber” gas station was still around, here in Portland! Don’t for get your 3D glasses!

Tramway from the front
These were shot on a very windy day, and I had to do some creative post work to contend with the subjects moving in the background between the 2 shots I took to create the anaglyph 3D effect.

Closeup view from the front, where the pumps once were.
The Tramway Gas station was built in 1965 and designed by architects Albert Frey and Robson Chambers and is an iconic design from one of the mid century capitols of the world, Palm Springs.
Getting back into shooting...
Title says it all, just making it official I guess. Shooting was the thing that got me into this business of retouching, and I have some nice gear, but after buying a house and starting a family it just got pushed off to the side. It has been hard to motivate myself to work on my own images when I spend so much time working on the images of others. Now I am moving back to creating rather than just fixing. This month there has not been one day I have not worked on my own images or setup cameras for the creation of images. And it is exciting, and above all, inspiring!
My Favorite King Kong Movie...Part 1
So there have been a few new films produced by Warner Brothers based on King Kong, and Godzilla that my friends are telling me are actually pretty good. I have not seen them. Don’t get me wrong, I am not a film snob or anything like that, it’s just that when it comes to a movie about a giant monster stamping out a city, I’m really into the olde skool special effects. It’s probably linked to my childhood and the wonder I had when I watched those movies. As a child, they looked so real, but I knew they could not be. I actually had this fantasy that Godzilla was a giant mechanical machine driven by a stuntman as he stomped out a real city. Well, when I saw these films when I was older, and reminded of my old ideas, I was quite embarrassed for myself. Still I love these guys in sweat filled suits stomping on toys and ignoring the strings on the copters and jets, and pretending that they are not swishing around in an indoor pool when there is a water scene.
This brings me to my favorite Kong movie of all. The 1976 Dino De Laurentiis King Kong remake. I do not know when I first saw this, but I did see it in the theater. It was not first run, but I do remember that when I was a kid here in Portland, in the late 70s there was a deal my parents got, where my little sister and I could see one movie a week in the summer and saw some awesome movies. This was when it was just fine to send your 2 under 10 year old kids to the movies for the day and not bat an eye.

This is a badass movie poster!
Anyways, on with the flick. This movie has it all. Jeff Bridges, The Dude himself, and Jessica Lang In her first acting job, creenplay by Lorenzo Semple, Jr. of the Batman TV show fame (another favorite), and a ferocious Kong. The third act in the city where kong goes on his rampage is classic. The audience is directed to feel empathy for the ape and what he is going through. Several views of him zoom in on his eyes, as if the viewers are invited to see Kongs actual vision. The scene at the end where he climbs the twin towers of the World Trade Center, is a classic reimagining of the original where Kong climbs the Empire State Building. Special effects are sub-par by todays standards but for the 1970s they were pretty epic. There was even a 40 foot tall mechanical Kong, though it was used sparingly (it really looked bad).
I wanted to show this film to my 6 year old, but decided to watch it first. Good thing too. The part where Kong kills a giant snake is very gory, as well as when the Hueys shoot Kong off the buildings-very bloody and graphic. I guess she will need to keep watching the Toyo movies at least for now. More Kong to come!
Posting 3D Photography...
While going through my server and cleaning out files, I found some Anaglyph 3D images I have not posted anywhere before and thought it would be great to share these shots. You will need a pair of red and blue glasses to view these images just like the old 3D movies of the 50s.
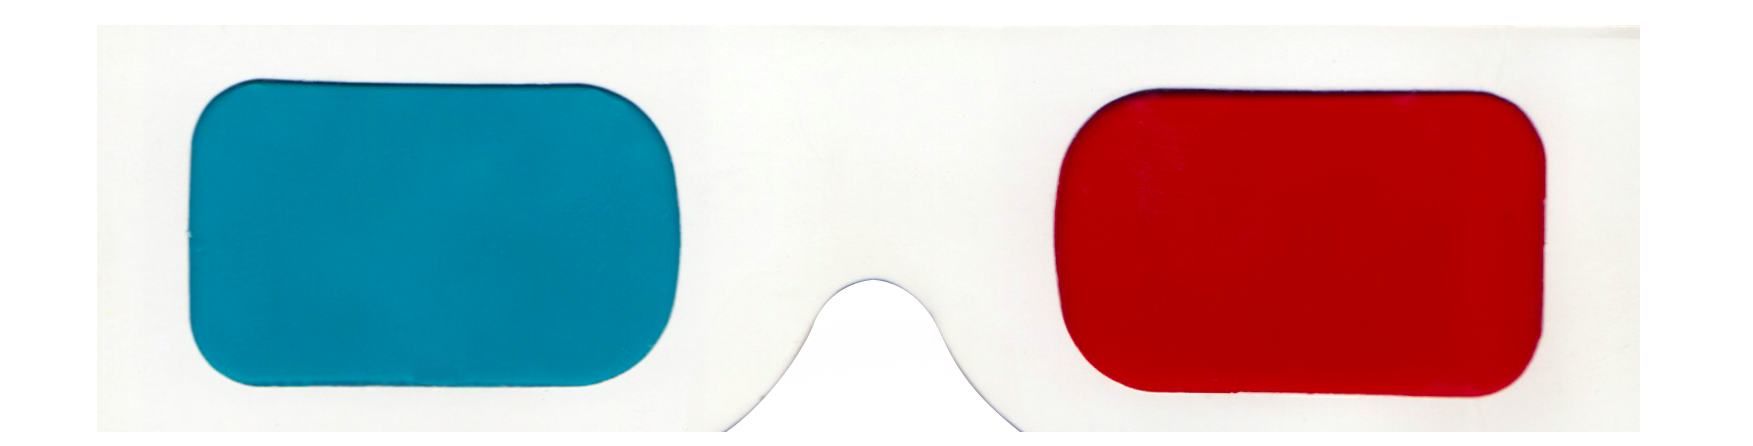
Remember these?
My first Anaglyph shot in this series will be of the former Tramway Gas Station in Palm Springs. This iconic building has since been converted to a visitors center just outside of the city as you approach from LA.

Tramway Gas Station, Palm Springs California. Converted to a visitors center.
Stay tuned for more anaglyph images from my archive and tutorials on how I created these images!
A*P*E movie from 1976
Anyone who knows me knows I love gorillas. I have a collection of rubber gorilla toys from the 70s on. I own a gorilla suit (2 actually). I especially love gorilla movies, and since 1933s King Kong there have been plenty of remakes and knock offs. Some great, some bad, but since they have a gorilla in them, I cannot resist.
And since we have been in this global pandemic, one of the best ways to pass the time in isolation has been to watch B-Movies and experience them with friends over the phone-which in lieu of a face-to-face meeting has been very fun!
Recently I watched a Kong knock off called: A*P*E. I have seen posters and artwork from this Korean-American film from 1976, rushed into production to compete with what I think is an excellent Kong movie, the Dino De Laurentis remake from that same year. I have always wanted to see this film, but it never really had the opportunity, that is, until now.

See A*P*E. Actully, don’t bother!
Now I have seen some good Kong knock offs and some very very bad ones. This one falls in the latter category. The Ape is clearly a guy in a suit, even has cuffs on the arms where the fur shirt meets the gloves. Even my crappiest gorilla suit looks better than this thing. And the fights, oh man, these are really bad. He fights a “giant snake” and you can tell its just a normal sized snake. They also have the Ape fight a shark, but it just looks like a guy doing his laundry at night in a river. The effects are super cheap.
A*P*E is not the worst Kongish movie out there, but its probably the second worst. Filmed in 3D this movie has some obvious 3D shot setups but viewing it streaming you never see the “cool factor”. I don’t mind when I see strings on special effects, but The end of the clip above, APE flips off the helicopter, or was it, in reality, the audience?

Doesn’t this look exciting? Sorry, it’s not.
Fully Vaccinated!
Finally, this cat has his vax! Fully vaccinated here at the cat’s lair!

death of a space hippy
Found out today that actress Mary Linda Rapelye, also know as Irina Gallulin, or Checkov’s girlfriend has died.
She is one of 4 space hippies, the third to die. Preceeded by Skip Homeler who played Dr Sevrin, Charles Napier who played Adam. There is now only one space hippie left, Tongo Rad, played by Victor Brandt.

Hippies in space
Marly Linda Rapelye died yesterday.